

Thinking about tackling your insulation project yourself, or hiring it out, and wondering “Is the DIY vs Professional Foam Insulation debate worth the time?” The answer is yes, because poor insulation can mean wasted money, drafts, cold spots, moisture problems, and higher energy bills.
On the flip side, done right, it brings comfort, lower bills, and long-term value. Whether you’re considering a full attic overhaul or just sealing rim joists with Injection foam insulation, the good news is that there is a solution.
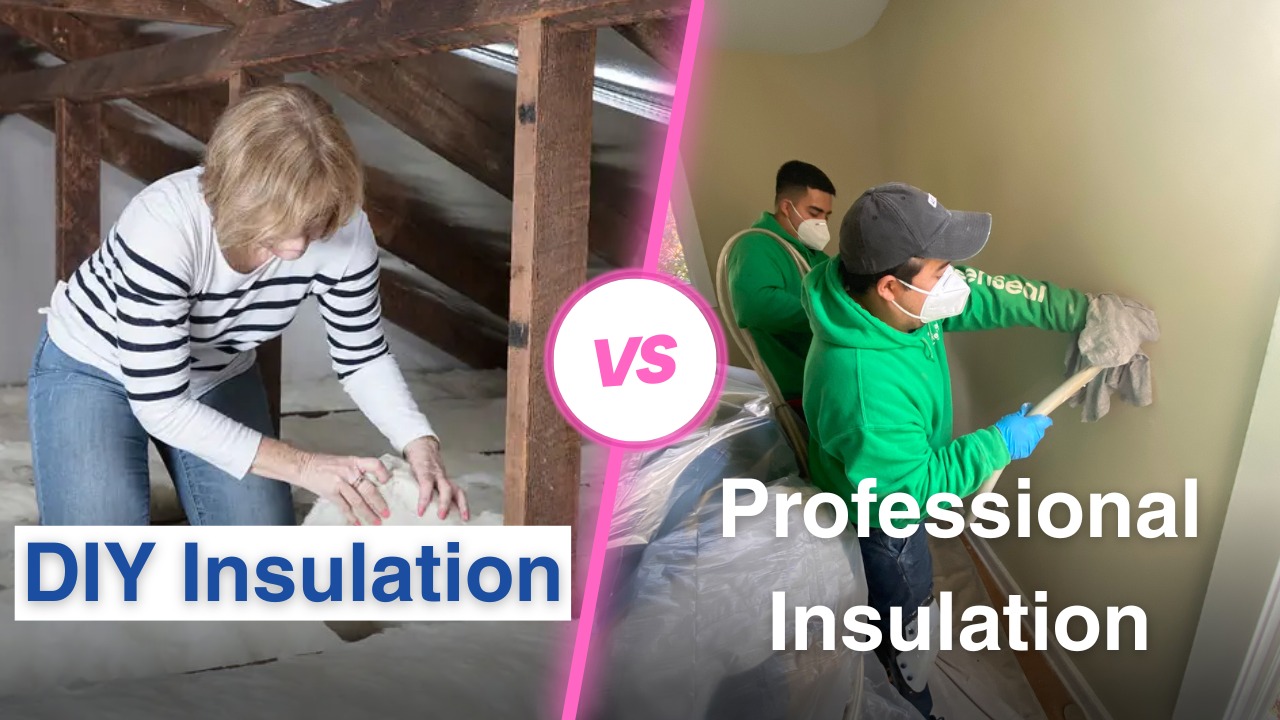
Foam Insulation Basics
A liquid foam that expands and solidifies to seal gaps and insulate. It serves both as insulation and as an insulation air-sealing layer.
- Two major types:
- Open-cell foam insulation: Lower density, lower cost, lower insulation R-value, more flexible.
- Closed-cell foam insulation: Higher density, higher R-value per inch, better moisture resistance and structural rigidity.
- Open-cell foam insulation: Lower density, lower cost, lower insulation R-value, more flexible.
- Insulation R-value: A measure of thermal resistance. Higher means better insulation performance. Foam types vary significantly in R-value.
- Insulation air sealing: Foam has the advantage of reducing air leaks and acting as a barrier. This is a major benefit beyond just material thickness.
What DIY Foam Insulation Involves
When you choose a DIY foam insulation approach here’s what you should expect:
Pros
- Cost savings on labor: You avoid paying for professional labour, which can reduce upfront cost.
- Flexibility: You can work at your own pace, choose when to do the job and maybe split it into stages.
- Sense of accomplishment: For DIY-savvy homeowners, doing the work yourself can be satisfying.
Cons & Risks
- Equipment and protective gear: even a DIY spray foam kit requires proper PPE (respirator, coveralls) and ideal conditions to spray and cure safely.
- Installation quality variability: If temperature, spray ratio, substrate preparation or expansion rate aren’t right, the foam might not cure properly, coverage may be spotty, or you may end up with voids or off-ratio foam.
- Time and mess: DIY takes longer, involves prep, cleaning, disposal of chemical containers, and may interfere with daily life.
- Limited scope: For large areas, enclosed wall cavities or complex geometry the DIY kits often aren’t adequate.
- Long-term risk: Mistakes can cost more later in energy bills, repairs, or worse air and moisture problems.
When DIY May Make Sense
- Small jobs: e.g., sealing around rim joists, band boards, attic penetrations, where scope is limited and risk manageable.
- You already have good DIY skills, tools, PPE, and a willingness to take responsibility.
- Your budget is tight, and the area is accessible and straightforward.
What Professional Foam Insulation Offers
Switching to professional installation of professional foam insulation, here are key benefits and trade-offs:
Benefits
- High-end equipment: Professional installers use proportioning machines, heated hoses, foam rigs, ensuring correct mix, temperature and pressure — leading to consistent material performance.
- Better coverage & quality: With experience, they can ensure full contact, correct thickness, avoid voids, and properly cure foam. That means the insulation system (including air sealing) performs closer to design expectations.
- Safety and compliance: Pros know building codes, ventilation requirements, inspections, disposal protocols, and can offer warranties.
- Large / complex jobs handled: Enclosed walls, multi-layer applications, difficult geometry, retrofits; they’re equipped for that.
- Better long-term value: Because installation quality is higher, you’re more likely to see predicted energy savings, improved comfort, and fewer risks of problems.
Trade-offs
- Higher upfront cost: Labour, equipment, overhead make it more expensive at first compared to DIY.
- Less DIY control: You rely on the contractor’s schedule, process and part of that means less personal hands-on involvement.
- Need to vet contractor: You still need to pick a reputable, insured installer; otherwise the “professional” label may not mean good quality.
When Professional Installation Makes Sense
- Large square footage: whole attic, full wall cavities, large crawl spaces or basement rim joists.
- Complex geometry or hard-to-access spaces.
- You want maximum performance, minimal risk and long-term payoff.
- You plan to stay in the home for many years or resale value matters.
Side-by-Side Comparison: DIY vs Professional
| Feature | DIY Foam Insulation | Professional Foam Insulation |
| Upfront Cost | Lower material-only cost, no labour | Higher due to labour, equipment, overhead Sprayfoam Solutions |
| Installation Quality | Highly dependent on your skill, tools, environmental conditions | More consistent, professional tools, experienced crew |
| R-value & Coverage | Risk of undershoot or overshoot, voids, poor adhesion | More likely to achieve specified R-value and full coverage |
| Safety & Compliance | You’re responsible for PPE, ventilation, waste disposal | Contractor handles safety protocols, code-compliance |
| Time & Disruption | More your time, longer duration | Shorter project duration, less homeowner labour |
| Long-Term Performance | More risk of energy loss, moisture issues, degradation | Better long-term performance, fewer surprises |
| Best for | Small fix-up jobs, budget-conscious DIYers | Whole-house upgrades, high performance goals, minimal compromise |
Key Factors to Evaluate Before You Choose
- How big is your project? If it’s just a rim joist or small attic patch, DIY may be viable. If a large area, go pro.
- Are you working around wires, plumbing, hidden cavities, existing insulation? Complexity leans professional.
- Can you handle spray chemicals, ensure correct PPE, cleanup, disposal? DIY must include safety.
- If you want top comfort, air sealing and lowest energy bills (or aiming resale value), professional is more predictable.
- If budget is tight now but you plan to stay many years, a professional job may pay off in energy savings.
- DIY means you bear the risk of mistakes; professional means you trade higher cost for more assurance.
What to Know if You Decide DIY
- Choose a reputable kit and read all manufacturer instructions (temperature, moisture, substrate prep).
- Invest in proper PPE: respirator rated for isocyanate exposure, coveralls, gloves, goggles.
- Ensure proper ventilation and isolate the area during and after curing.
- Do small test areas first to get a feel for expansion and foam thickness.
- Measure your area accurately so you purchase enough board-feet. Running out or buying too much both cost more.
- Be aware of disposal laws for leftover tanks/canisters. DIY kits often don’t include full disposal guidance.
- Know that if you screw it up, you may need to remove and redo the work (and that means extra cost).
Foam Type Considerations: Open-Cell vs Closed-Cell
In both DIY and professional settings you’ll need to consider which foam type to use:
- Open-cell foam insulation: Lower R-value (approx 3.5-4 per inch), less dense, better for interior walls, sound absorption, budget-friendly.
- Closed-cell foam insulation: Higher R-value (often 6-7 per inch), acts as vapor barrier, more rigid, better for exterior walls, basements, crawlspaces where moisture may be an issue.
- If you choose DIY, open-cell may be more forgiving; closed-cell needs more precision.
- Professional installers will help decide which is appropriate based on your home’s climate, building envelope and goals.
Costs & ROI: What to Expect
- DIY kits may cost around $1-2 per board foot (material only) but your labour, learning curve, and potential errors aren’t always accounted for.
- Professional jobs may cost approximately $2.50-$5.50 per board foot depending on size, foam type, difficulty and region.
- Importantly: Studies show that professional install often delivers better energy savings because of better coverage and air sealing. Some sources suggest up to 50% better performance vs homeowner install.
- Therefore, although DIY is cheaper upfront, the true cost (including energy loss, inefficiency, possible remediation) must be considered.
Conclusion
If you’re in Milan or Lombardy and want expert help to evaluate your home’s insulation, consider reaching out to WeatherFoam. We can offer a consultation, assess what’s best (DIY-friendly vs pro install), recommend which foam type and provide a quote.
Let’s get your home comfortable, efficient, and properly insulated with the peace of mind you deserve.